今回は、Azure CLI の az storage blob を試していこうと思います。
Storage Account 上のファイルをローカルに持ってきたり、アップロードしたり、名前を変更させたり、やっていきたいと思います。
az storage blob には、どんなコマンドがあるか
まずは、どんなコマンドがあるか Microsoft のドキュメント「az storage blob」を確認します。
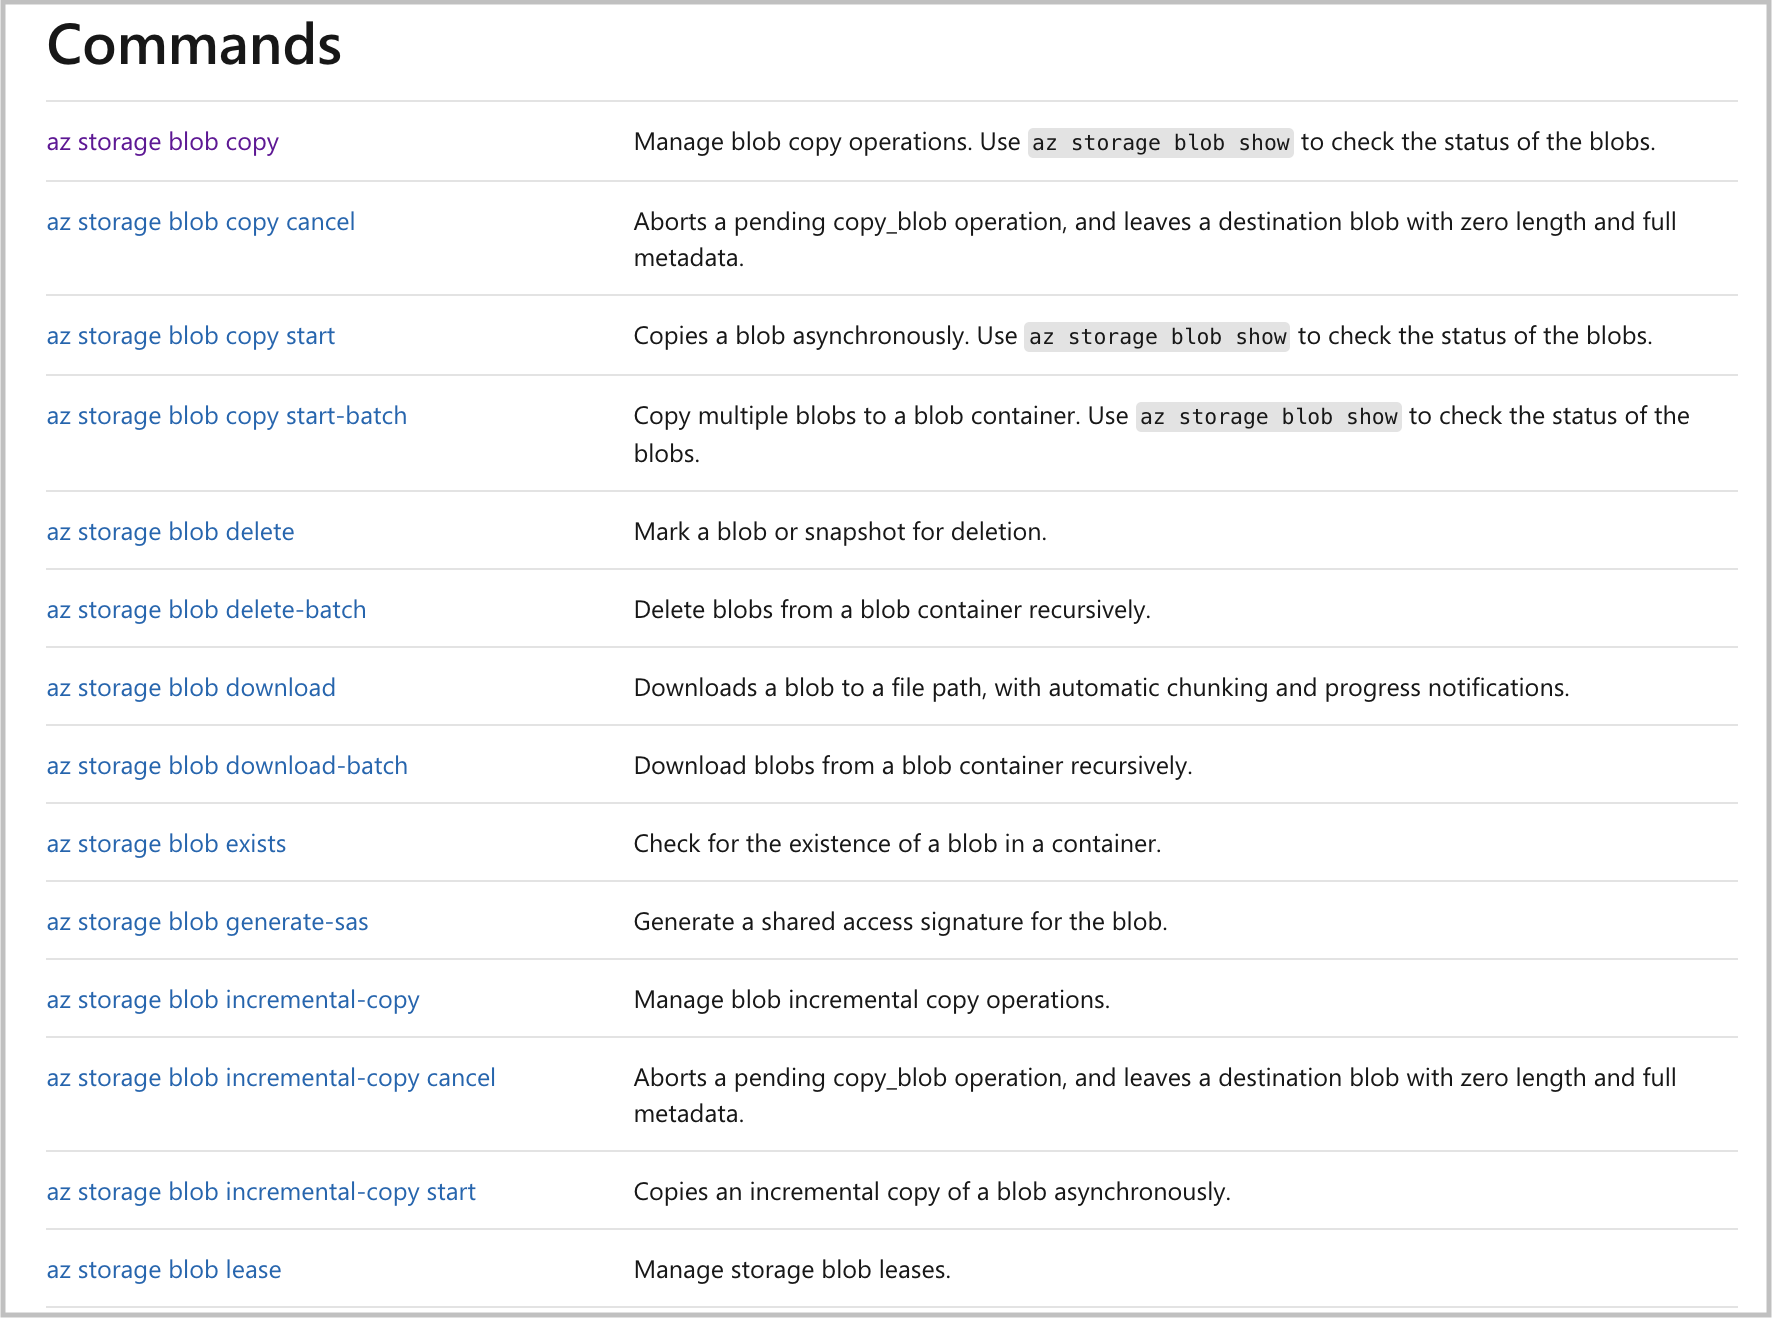
上記で掲載しているのは一部です。全体では40個くらいありますね。全部試すのは厳しいので絞っていきたいと思います。
AWS の S3 でよく使うコマンドは list,get,put,cp,mv,delete あたりですので、これらに対応するコマンドを Azure CLI でも試してみようかと思います。
以下の手順で使用するアカウントは対象の Subscription に対して Contributor 以上の権限を有していることを前提とします。
認証 az login
Azure CLI を利用するために AD 認証します。
$ az login
# ブラウザに遷移して azure へのログインを求められます。
# ログインが成功すると下記のような結果が返ってきます。
[
{
"cloudName": "AzureCloud",
"homeTenantId": "00000000-0000-0000-0000-000000000000",
"id": "00000000-0000-0000-0000-000000000000",
"isDefault": true,
"managedByTenants": [],
"name": "Microsoft Azure",
"state": "Enabled",
"tenantId": "00000000-0000-0000-0000-000000000000",
"user"https://www.se-from30.com/?p=2490&preview=true: {
"name": "your.email.address@sample.com",
"type": "user"
}
}
]
az storage blob の 認証(--auth-mode login)
az storage blob のコマンドを使うためには対象の Storage Account への認証を行う必要がありまして、その方法は大きく4種類です。
- --connection-string
- --account-key
- --sas-token
- --auth-mode login
コマンドの中身はそれぞれの方法によって異なりますが、--auth-mode login とそれ以外という分類で良いと思います。
実は、Storage Account を作成した時にアクセスキーが自動的に生成されていて、Storage Account の API を利用するときはそのアクセスキーを使うことができます。
しかし、Azure の推奨はアクセスキーを使うのではなく、Azure AD を使った RBAC によるアクセス制御です。
az storage blob list
では、実際に list を実行してみたいと思います。今回 list を実行したいのは以下の Blob の Container です。
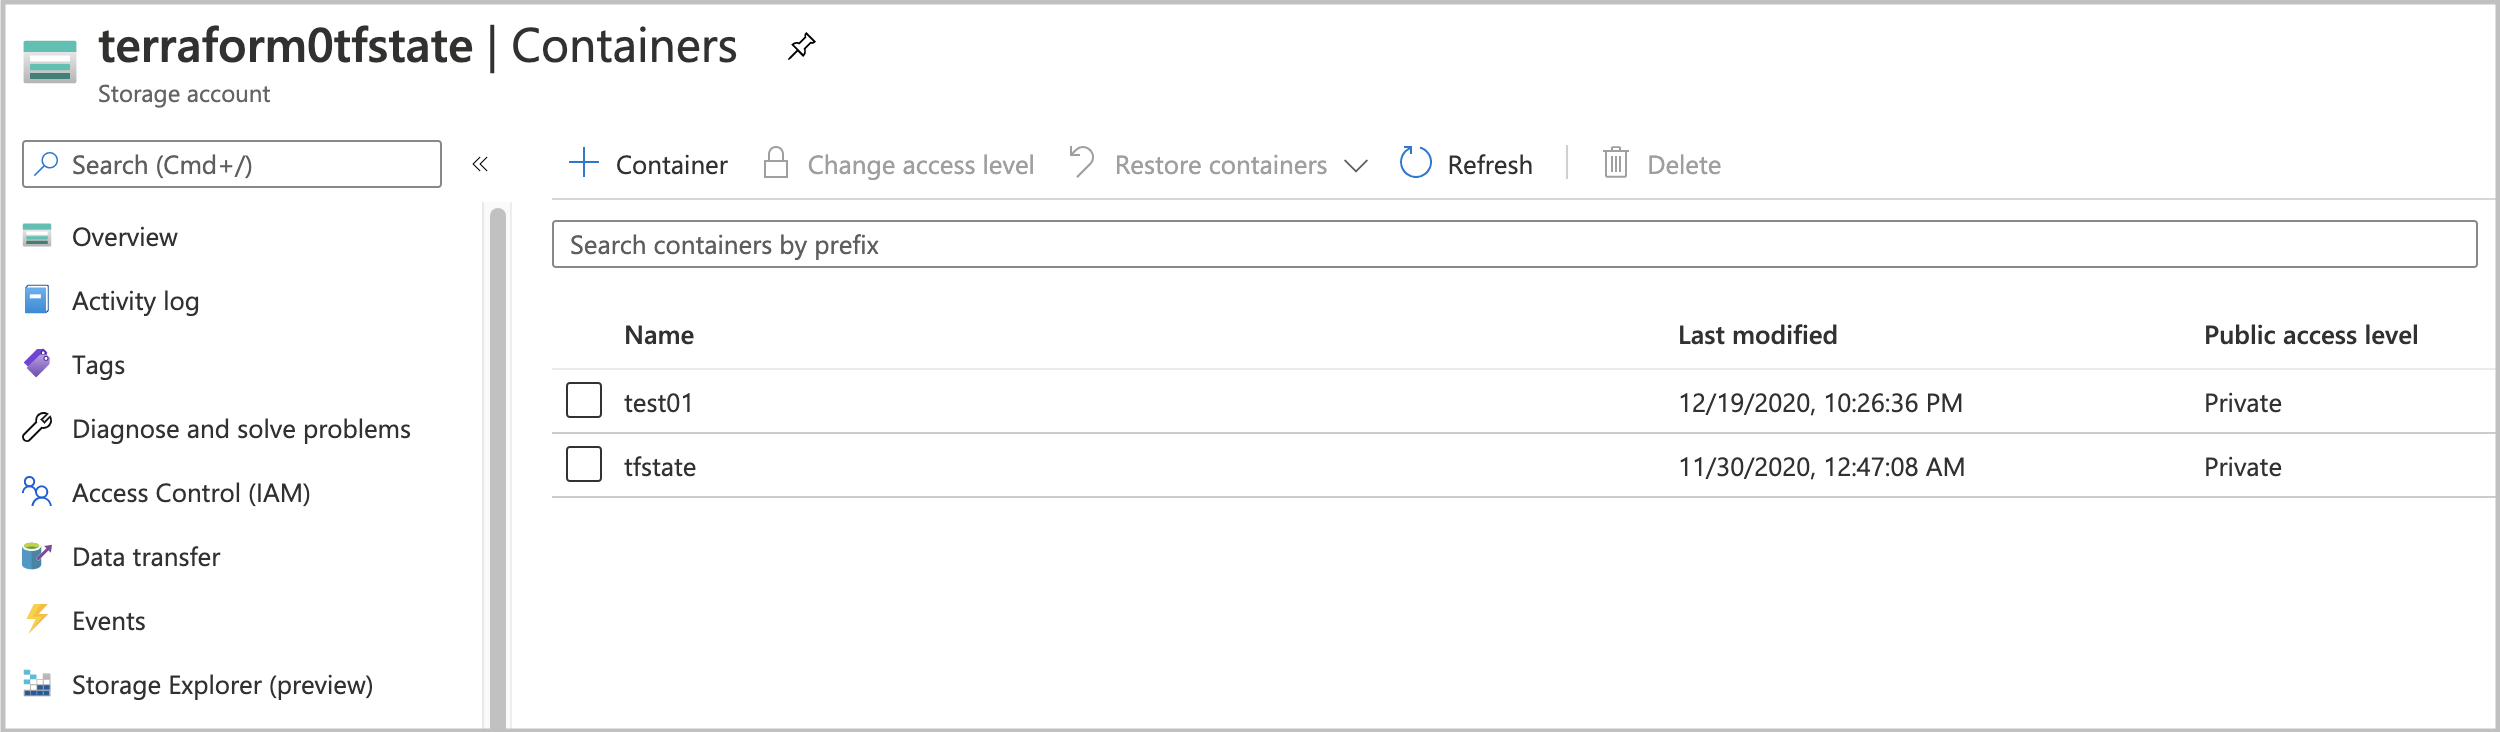
実行したのは以下のコマンドです。
$ az storage blob list --auth-mode login --account-name terraform0tfstate -c tfstate
ForbiddenError:
You do not have the required permissions needed to perform this operation.
Depending on your operation, you may need to be assigned one of the following roles:
"Storage Blob Data Contributor"
"Storage Blob Data Reader"
"Storage Queue Data Contributor"
"Storage Queue Data Reader"
If you want to use the old authentication method and allow querying for the right account key, please use the "--auth-mode" parameter and "key" value.
権限が足りないと怒られてしまいました。今回アクセスしたかったのは、Blob Data でしたので、"Storage Blob Data Contributor" か "Storage Blob Data Reader" のロールが必要であることが分かります。
以下のコマンドで "Storage Blob Data Owner" を付与します。今回は "Storage Blob" の中でも一番強い権限を付与することにします。
$ az role assignment create \
> --assignee="00000000-0000-0000-0000-000000000000" \
> --role="Storage Blob Data Owner" \
> --scope="/subscriptions/00000000-0000-0000-0000-000000000000"
{
"canDelegate": null,
"condition": null,
"conditionVersion": null,
"description": null,
"id": "/subscriptions/00000000-0000-0000-0000-000000000000/providers/Microsoft.Authorization/roleAssignments/11209f73-5406-47b2-854c-56b31c32930b",
"name": "11209f73-5406-47b2-854c-56b31c32930b",
"principalId": "00000000-0000-0000-0000-000000000000",
"principalType": "User",
"roleDefinitionId": "/subscriptions/00000000-0000-0000-0000-000000000000/providers/Microsoft.Authorization/roleDefinitions/b7e6dc6d-f1e8-4753-8033-0f276bb0955b",
"scope": "/subscriptions/00000000-0000-0000-0000-000000000000",
"type": "Microsoft.Authorization/roleAssignments"
}
では、list コマンドのリベンジをしたいと思います。
$ az storage blob list --auth-mode login --account-name terraform0tfstate -c tfstate
[
{
"container": "tfstate",
"content": "",
"deleted": null,
"encryptedMetadata": null,
"encryptionKeySha256": null,
"encryptionScope": null,
"isAppendBlobSealed": null,
"isCurrentVersion": null,
"metadata": {},
"name": "test01.tfstate",
"objectReplicationDestinationPolicy": null,
"objectReplicationSourceProperties": [],
...
}
]
成功しました。"tfstate" に格納していた "test01.tfstate" が表示されていますね。
az storage blob コマンド実行例
それでは、色々なコマンドを試してみます。
Storage Account の一覧取得
取得結果は json 形式で全てのプロパティが表示されてしまい見づらいので、ストレージアカウント名だけ表示するように整形します。
az storage account list | jq -r .[].name
Storage Account 内の Containers の一覧を取得
az storage container list \
--account-name terraform0tfstate \
--auth-mode login | jq -r .[].name
Containers 内の blob 一覧を取得
az storage blob list \
--auth-mode login \
--account-name terraform0tfstate \
--container-name tfstate | jq -r .[].name
ファイルを storage blob に upload
ローカルファイル "main.tf" を Storage Account "terraform0tfstate" の Containers "test01" に Blob Name "sample.tf" で upload します。
az storage blob upload \
--account-name terraform0tfstate \
--auth-mode login \
--container-name test01 \
--name sample.tf \
--file "/Users/atsushi/github/terraform_azure_v1/main.tf"
ファイルを storage blob から download
Storage Account "terraform0tfstate" の Containers "test01" にある Blob Name "sample.tf" をローカルファイル "download.tf" として download します。
az storage blob download \
--account-name terraform0tfstate \
--auth-mode login \
--container-name test01 \
--name sample.tf \
--file "/Users/atsushi/github/terraform_azure_v1/download.tf"
ファイルを storage blob 上で copy
以下のコマンドは "同一" Storage Account 内での copy です。
az storage blob copy start \
--account-name terraform0tfstate \
--auth-mode login \
--destination-blob sample2.tf \
--destination-container tfstate \
--source-blob sample.tf \
--source-container test01
以下のコマンドは "異なる" Storage Account 間での copy です。
az storage blob copy start \
--account-name koizumisample01 \
--auth-mode login \
--destination-blob sample2.tf \
--destination-container koizumi-test02 \
--source-account-name terraform0tfstate \
--source-container test01 \
--source-blob sample.tf
storage blob を delete
以下のコマンドでファイルを消すことが可能です。
az storage blob delete \
--account-name koizumisample01 \
--auth-mode login \
--container-name koizumi-test02 \
--name sample2.tf
おまけ
Azure CLI を触り始めてまだ数日ですが、徐々に慣れてきた感じはしています。
"--help" と打てばパラメータで何が必要かは、すぐに確認することができます。
az storage blob --help
本当は他にもたくさんの az storage blob アクションがあったのですが試せてはいません。
また、バッチ処理などを想定して recursive にファイルを取得して順番に処理したりと、色々なことを試してみようと思っています。
StorageAccountAzureCLI